
Table of Contents
Introduction to Cherry Jelly Recipe
What Is Cherry Jelly?
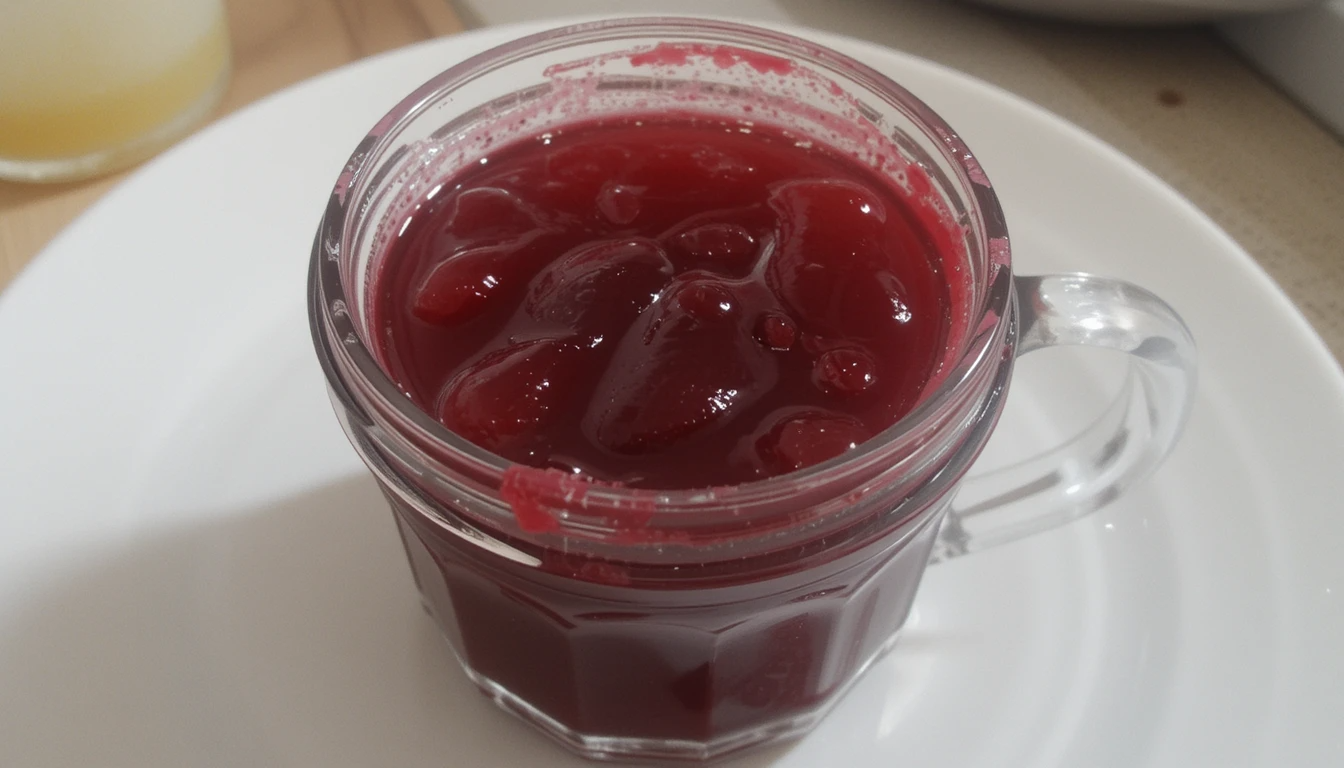
Cherry jelly is a classic fruit spread made from fresh cherries, sugar, and pectin. This delicious jelly captures the vibrant flavor and color of ripe cherries, making it a perfect accompaniment to toast, biscuits, or even as a filling for pastries. The process of making cherry jelly involves cooking down the cherries, extracting their juice, and combining it with sugar and pectin to achieve the perfect consistency.
The History and Popularity of Cherry Jelly
Cherry jelly has been a beloved spread for generations, with its origins tracing back to traditional methods of preserving fruits. The practice of making jams and jellies has been passed down through families, ensuring that the art of homemade preserves continues to thrive. Cherry jelly’s vibrant color and sweet-tart flavor make it a favorite among many, and it remains a staple in kitchens around the world.
Essential Ingredients for Cherry Jelly Recipe
Fresh Cherries: The Star Ingredient
Fresh cherries are the star ingredient in this recipe. Opt for ripe, juicy cherries for the best flavor. You can use sweet or tart cherries, depending on your preference. Ensure the cherries are pitted before use.
| Ingredient | Quantity |
|---|---|
| Fresh cherries, pitted | 4 cups (600g) |
Sugar: The Sweetener
Sugar not only sweetens the jelly but also acts as a preservative. Use granulated sugar for the best results. The amount of sugar can be adjusted based on the sweetness of the cherries and your personal preference.
| Ingredient | Quantity |
|---|---|
| Granulated sugar | 3 cups (600g) |
Pectin: The Thickening Agent
Pectin is a natural thickening agent derived from fruits. It helps the jelly achieve its characteristic gel-like consistency. You can use powdered or liquid pectin, following the package instructions for the correct amount.
| Ingredient | Quantity |
|---|---|
| Powdered pectin | 1.75 oz (50g) package |
Lemon Juice: Adding Brightness
Lemon juice adds a bright, citrusy note to the jelly and helps balance the sweetness. It also aids in the gelling process by providing the necessary acidity.
| Ingredient | Quantity |
|---|---|
| Fresh lemon juice | 1/4 cup (60 ml) |
Water: The Base
Water is used to extract the juice from the cherries and create the base for the jelly. The amount of water can be adjusted based on the juiciness of the cherries.
| Ingredient | Quantity |
|---|---|
| Water | 1/2 cup (120 ml) |
Step-by-Step Cherry Jelly Recipe

Now that you have all the essential ingredients, let’s dive into the step-by-step cherry jelly recipe. This guide will walk you through each stage of the process, ensuring you achieve the perfect consistency and flavor every time.
Preparing the Cherries
| Step | Instruction |
|---|---|
| 1 | Wash the Cherries: Rinse the fresh cherries under cold water to remove any dirt or residue. |
| 2 | Pit the Cherries: Remove the pits from the cherries using a cherry pitter or a knife. Ensure all pits are removed to avoid any unwanted bits in your jelly. |
| 3 | Crush the Cherries: Place the pitted cherries in a large pot and use a potato masher or the back of a spoon to crush them slightly. This helps release their juices. |
Cooking the Jelly Mixture
| Step | Instruction |
|---|---|
| 1 | Add Water: Pour the measured water into the pot with the crushed cherries. |
| 2 | Heat the Mixture: Place the pot on the stove over medium heat. Bring the mixture to a boil, then reduce the heat to low and let it simmer for about 10-15 minutes. This helps extract the juice from the cherries. |
| 3 | Strain the Juice: Use a fine-mesh sieve or cheesecloth to strain the cherry mixture, separating the juice from the solids. Press gently on the solids to extract as much juice as possible. Discard the solids. |
| 4 | Measure the Juice: Measure the extracted cherry juice. You should have about 3 cups (710 ml) of juice. If you have less, add a bit of water to reach the desired amount. |
Adding Pectin
| Step | Instruction |
|---|---|
| 1 | Prepare the Pectin: In a small bowl, mix the powdered pectin with a small amount of the cherry juice to create a smooth mixture. This helps prevent lumps from forming. |
| 2 | Combine the Ingredients: In a large pot, combine the cherry juice, pectin mixture, granulated sugar, and lemon juice. Stir well to ensure all ingredients are fully incorporated. |
| 3 | Cook the Mixture: Bring the mixture to a full rolling boil over high heat, stirring constantly. Once it reaches a boil, continue to boil for exactly 1 minute, then remove from heat. |
Canning the Jelly
| Step | Instruction |
|---|---|
| 1 | Prepare the Jars: Sterilize your canning jars and lids by boiling them in water for about 10 minutes. This ensures that any bacteria are killed and the jars are clean. |
| 2 | Fill the Jars: Ladle the hot jelly mixture into the sterilized jars, leaving about 1/4 inch (6 mm) of headspace at the top. Wipe the rims of the jars clean with a damp cloth. |
| 3 | Seal the Jars: Place the lids on the jars and screw on the bands tightly. |
| 4 | Process the Jars: Place the filled jars in a water bath canner, ensuring they are completely submerged in water. Process the jars for about 10 minutes. This helps create a vacuum seal. |
Cooling and Setting
| Step | Instruction |
|---|---|
| 1 | Remove the Jars: Carefully remove the jars from the water bath canner and place them on a towel-lined counter to cool. |
| 2 | Check the Seals: As the jars cool, you should hear a popping sound as the lids seal. Once the jars are completely cooled, press down on the center of each lid to ensure it is sealed properly. If the lid does not flex, the jar is sealed. |
| 3 | Store the Jelly: Label and date the jars, then store them in a cool, dark place for up to one year. Once opened, store the jelly in the refrigerator and consume within a few weeks. |
By following these detailed steps, you’ll be well on your way to creating the perfect homemade cherry jelly.
Tips for Making the Perfect Cherry Jelly
Creating the perfect cherry jelly involves more than just following a recipe. Here are some essential tips to help you achieve the best results every time:
Choosing the Right Cherries
- Ripe and Juicy: Opt for ripe, juicy cherries for the best flavor and juice extraction. Avoid using underripe or overripe cherries, as they may not provide enough juice or flavor.
- Variety Matters: Choose a variety of cherries that suits your taste preference. Sweet cherries will result in a sweeter jelly, while tart cherries will provide a more tangy flavor.
Achieving the Perfect Consistency
- Measure Accurately: Ensure you measure the ingredients accurately, especially the pectin and sugar. The correct ratio of these ingredients is crucial for achieving the perfect gel-like consistency.
- Boil Properly: Bring the jelly mixture to a full rolling boil and maintain it for exactly 1 minute. This helps activate the pectin and ensures proper gelling.
Ensuring Proper Canning
- Sterilize Jars: Always sterilize your canning jars and lids to kill any bacteria and ensure a clean environment for your jelly.
- Headspace: Leave the recommended headspace at the top of the jars to allow for proper sealing and to prevent the jelly from overflowing during processing.
Storing Your Jelly
- Cool, Dark Place: Store your sealed jars of jelly in a cool, dark place, such as a pantry or basement. This helps maintain the quality and flavor of the jelly.
- Refrigerate After Opening: Once a jar of jelly is opened, store it in the refrigerator and consume it within a few weeks to maintain freshness and prevent spoilage.
Variations of the Cherry Jelly Recipe
One of the best things about making cherry jelly at home is the ability to customize the recipe to suit your tastes or dietary needs. Here are some popular variations to try:
Adding Different Fruits
- Mixed Berry: Combine cherries with other berries, such as strawberries, raspberries, or blueberries, for a mixed berry jelly. This variation adds a blend of flavors and a vibrant color.
- Cherry-Apple: Incorporate apples into the cherry jelly for a sweet and tart flavor combination. The natural pectin in apples can also help with the gelling process.
- Cherry-Peach: Add peaches to the cherry jelly for a sweet and juicy flavor. This variation provides a unique twist on the classic cherry jelly.
Incorporating Spices
- Cinnamon: Add a pinch of cinnamon to the jelly mixture for a warm and aromatic flavor. Cinnamon pairs well with the sweet and tart notes of the cherries.
- Vanilla: Incorporate a small amount of vanilla extract or a vanilla bean to the jelly mixture for a rich and creamy flavor. Vanilla adds a depth of flavor to the jelly.
- Cloves: Add a few whole cloves to the jelly mixture during cooking for a warm and spicy note. Remove the cloves before canning the jelly.
Experimenting with Sweeteners
- Honey: Substitute a portion of the granulated sugar with honey for a natural and floral sweetness. Honey also provides additional health benefits.
- Maple Syrup: Use maple syrup as a sweetener for a rich and caramel-like flavor. Maple syrup adds a unique depth of flavor to the jelly.
- Stevia: Incorporate stevia as a natural, low-calorie sweetener for a healthier alternative. Stevia provides sweetness without the added calories of sugar.
Frequently Asked Questions (FAQs)
How Long Does Cherry Jelly Last?
Properly canned and sealed cherry jelly can last for up to one year when stored in a cool, dark place. Once opened, store the jelly in the refrigerator and consume it within a few weeks for the best freshness and flavor.
Can I Use Frozen Cherries?
Yes, you can use frozen cherries to make cherry jelly. Frozen cherries are often just as flavorful as fresh cherries and can be more convenient to use. Ensure the cherries are fully thawed and drained before using them in the recipe.
What If My Jelly Doesn’t Set?
If your cherry jelly doesn’t set, it may be due to not using enough pectin or not boiling the mixture properly. Here are some tips to fix a jelly that doesn’t set:
- Reheat and Add Pectin: If the jelly doesn’t set after 24 hours, you can reheat it and add more pectin. Bring the jelly mixture to a boil, add more pectin, and boil for an additional minute. Then, re-can the jelly following the proper canning procedures.
- Check Sugar Ratio: Ensure you are using the correct ratio of sugar to pectin. Too much or too little sugar can affect the gelling process.
Can I Make Cherry Jelly Without Pectin?
Yes, you can make cherry jelly without pectin, but it may result in a softer set or a longer cooking time. To make jelly without pectin, you can use fruits that are naturally high in pectin, such as apples or citrus fruits, to help with the gelling process. Keep in mind that the consistency may vary compared to jelly made with pectin.
How Do I Store Cherry Jelly?
Store cherry jelly in sterilized, sealed jars in a cool, dark place, such as a pantry or basement. Once opened, store the jelly in the refrigerator and consume it within a few weeks to maintain freshness and prevent spoilage.
What Are Some Health Benefits of Cherry Jelly?
Cherry jelly offers various health benefits due to its ingredients:
- Cherries: Rich in antioxidants, which help protect the body from damage by harmful molecules called free radicals. Cherries also contain vitamin C, which supports immune function and skin health.
- Pectin: A natural thickening agent derived from fruits, pectin is a type of soluble fiber that aids in digestion and helps lower cholesterol levels.
- Lemon Juice: Provides vitamin C, which supports immune function and overall health. Lemon juice also contains citric acid, which aids in the gelling process.
- Sugar: While sugar is primarily a source of carbohydrates, it provides a quick energy boost and contributes to the overall sweetness and enjoyment of the jelly.
By addressing these common questions, you’ll be well-equipped to handle any challenges that may arise during your cherry jelly-making adventures.
Conclusion
Mastering the cherry jelly recipe allows you to create a delicious and classic fruit spread that is perfect for any occasion. By understanding the essential ingredients, following a step-by-step recipe, and applying helpful tips, you can achieve the perfect consistency and flavor every time.
Enjoy Your Homemade Cherry Jelly!
Now that you have a comprehensive understanding of the cherry jelly recipe, it’s time to start cooking! Experiment with different variations, share your creations with loved ones, and enjoy the fruits of your labor. Remember, practice makes perfect, so don’t be discouraged if your first attempt isn’t exactly as you envisioned. With each try, you’ll gain more experience and confidence in your cherry jelly-making skills.
Happy cooking, and enjoy your delicious, homemade cherry jelly!
Homemade Cherry Jelly Recipe: A Classic Fruit Spread
Ingredients
- 4 cups about 2 lbs fresh cherries, pitted (or frozen cherries, thawed)
- 1/4 cup 60ml lemon juice
- 4 cups 800g granulated sugar
- 1 packet 1.75 oz powdered fruit pectin
- 1/2 tsp butter optional, to reduce foaming
- Water as needed
Instructions
- cherry

- Prepare the cherries: Wash, pit, and roughly chop the cherries.
- Cook the cherries: In a large pot, combine the cherries and lemon juice. Add just enough water to cover the cherries (about 1/2 cup). Bring to a boil, then reduce heat and simmer for 10-15 minutes, until the cherries are soft.
- Strain the juice: Place a fine-mesh strainer or cheesecloth over a bowl. Pour the cooked cherries into the strainer and let the juice drip through. Do not press the pulp, as this can make the jelly cloudy. You should have about 3-4 cups of cherry juice.
- Prepare the jelly: In a clean pot, combine the cherry juice and pectin. Add the butter (if using) to reduce foaming. Bring the mixture to a full rolling boil over high heat, stirring constantly.
- Add the sugar: Once boiling, add the sugar all at once. Return to a full boil and let it boil hard for 1-2 minutes, stirring constantly.
- Test for doneness: To check if the jelly is ready, use a spoon to scoop a small amount and let it cool slightly. If it gels and holds its shape, it’s done. If not, boil for another minute and test again.
- Skim off foam: Use a spoon to skim off any foam from the surface of the jelly.
- Jar the jelly: Carefully pour the hot jelly into sterilized jars, leaving 1/4-inch headspace. Wipe the rims clean, then seal with sterilized lids and rings.
- Process the jars: Process the jars in a boiling water bath for 10 minutes to ensure a proper seal. Remove and let cool completely. Check the seals before storing.
Video
Notes
- Pectin: If you prefer a softer jelly, you can reduce the amount of pectin slightly.
- Storage: Store sealed jars in a cool, dark place for up to 1 year. Once opened, refrigerate and use within 2-3 weeks.
- Yield: This recipe makes about 4-5 half-pint (8 oz) jars.
- No pectin option: If you don’t have pectin, you can make jelly by boiling the cherry juice and sugar until it reaches the gel stage (220°F/104°C on a candy thermometer).