
Table of Contents
Introduction to Nostalgia Ice Cream Maker Recipes
What Makes Nostalgia Ice Cream Makers Special?
Nostalgia ice cream makers are beloved for their ability to transport us back to simpler times. These vintage-inspired machines often feature classic designs and simple mechanics, reminiscent of old-fashioned ice cream parlors. They allow you to create homemade ice cream with a touch of nostalgia, bringing back memories of summer days and family gatherings.
The Joy of Classic Ice Cream Flavors
Classic ice cream flavors like vanilla, chocolate, and strawberry hold a special place in our hearts. They evoke memories of childhood treats and family outings. With a Nostalgia ice cream maker, you can recreate these timeless flavors at home, adding your own personal touch and enjoying the process of making ice cream from scratch.
Essential Ingredients for Nostalgia Ice Cream Maker Recipes
Heavy Cream: The Base of Rich Ice Cream
Heavy cream is the foundation of rich, creamy ice cream. Its high fat content provides the velvety texture and indulgent mouthfeel that we love in ice cream. Opt for high-quality heavy cream for the best results.
Milk: Adding Creaminess
Milk adds creaminess and balances the richness of the heavy cream. Whole milk is typically used for its higher fat content, but you can also use 2% milk for a lighter option. Ensure the milk is fresh for the best flavor.
Sugar: Sweetening the Deal
Sugar not only sweetens the ice cream but also contributes to its texture. Granulated sugar is commonly used, but you can also experiment with other sweeteners like honey or maple syrup for added flavor.
Vanilla Extract: The Classic Flavor
Vanilla extract is a staple in many ice cream recipes, providing a warm, sweet flavor that complements the creaminess of the ice cream. Use pure vanilla extract for the best taste.
Eggs: Adding Richness (Optional)
Eggs can be used to add richness and a custard-like texture to ice cream. They are often used in French-style ice cream recipes. Ensure the eggs are fresh and of high quality.
Classic Nostalgia Ice Cream Maker Recipes
Let’s dive into some classic Nostalgia ice cream maker recipes that will take you back to simpler times. These timeless flavors are sure to bring a smile to your face and delight your taste buds.
Old-Fashioned Vanilla Ice Cream
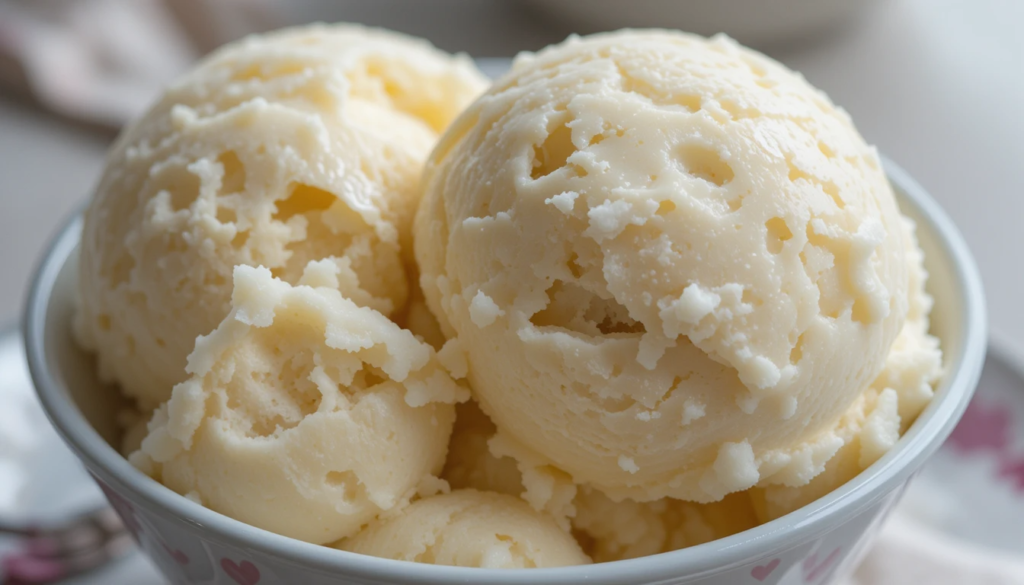
| Ingredients | Quantity |
|---|---|
| Heavy cream | 2 cups (473 ml) |
| Whole milk | 1 cup (237 ml) |
| Granulated sugar | 3/4 cup (150g) |
| Vanilla extract | 1 tbsp |
| Salt | 1/4 tsp |
| Ice | As needed |
| Rock salt | As needed |
Instructions:
- Combine Ingredients: In a large bowl, whisk together the heavy cream, whole milk, granulated sugar, vanilla extract, and salt until the sugar is fully dissolved.
- Chill the Mixture: Cover the bowl and refrigerate the mixture for at least 2 hours, or until it is very cold. This step is crucial for achieving the best texture.
- Prepare the Ice Cream Maker: Follow the manufacturer’s instructions to set up your Nostalgia ice cream maker. Typically, this involves filling the outer bucket with ice and adding rock salt to lower the freezing point.
- Churn the Ice Cream: Pour the chilled ice cream mixture into the ice cream maker’s inner canister. Churn the ice cream according to the manufacturer’s instructions, usually for about 20-30 minutes, or until the ice cream reaches a soft-serve consistency.
- Freeze: Transfer the ice cream to an airtight container and freeze for at least 2 hours, or until it reaches your desired firmness.
- Serve: Scoop the ice cream into bowls or cones and enjoy your homemade vanilla ice cream!
Rich Chocolate Ice Cream
| Ingredients | Quantity |
|---|---|
| Heavy cream | 2 cups (473 ml) |
| Whole milk | 1 cup (237 ml) |
| Granulated sugar | 3/4 cup (150g) |
| Unsweetened cocoa powder | 1/2 cup (42g) |
| Vanilla extract | 1 tsp |
| Salt | 1/4 tsp |
| Ice | As needed |
| Rock salt | As needed |
Instructions:
- Combine Ingredients: In a large bowl, whisk together the heavy cream, whole milk, granulated sugar, unsweetened cocoa powder, vanilla extract, and salt until the sugar and cocoa powder are fully dissolved.
- Chill the Mixture: Cover the bowl and refrigerate the mixture for at least 2 hours, or until it is very cold.
- Prepare the Ice Cream Maker: Set up your Nostalgia ice cream maker according to the manufacturer’s instructions, filling the outer bucket with ice and adding rock salt.
- Churn the Ice Cream: Pour the chilled ice cream mixture into the ice cream maker’s inner canister. Churn the ice cream for about 20-30 minutes, or until it reaches a soft-serve consistency.
- Freeze: Transfer the ice cream to an airtight container and freeze for at least 2 hours, or until it reaches your desired firmness.
- Serve: Enjoy your rich, homemade chocolate ice cream!
Strawberry Ice Cream Delight
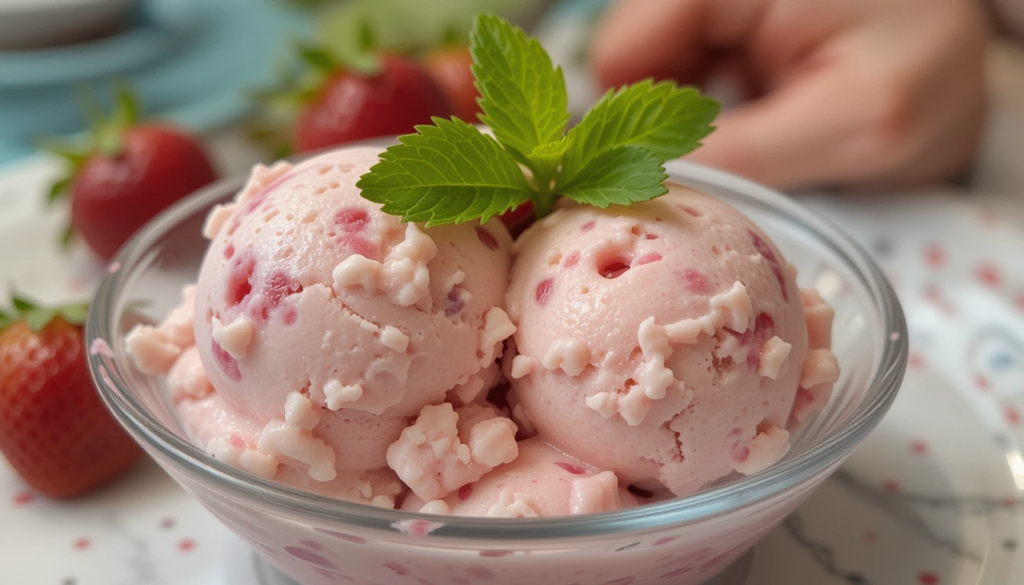
| Ingredients | Quantity |
|---|---|
| Fresh strawberries, hulled and sliced | 2 cups (300g) |
| Granulated sugar | 1/2 cup (100g) |
| Heavy cream | 2 cups (473 ml) |
| Whole milk | 1 cup (237 ml) |
| Vanilla extract | 1 tsp |
| Salt | 1/4 tsp |
| Ice | As needed |
| Rock salt | As needed |
Instructions:
- Prepare the Strawberries: In a bowl, combine the sliced strawberries with 1/4 cup (50g) of granulated sugar. Let the mixture macerate for about 30 minutes to release the juices.
- Blend the Strawberries: Blend the macerated strawberries until smooth. You can leave some chunks for texture if desired.
- Combine Ingredients: In a large bowl, whisk together the heavy cream, whole milk, remaining 1/4 cup (50g) of granulated sugar, vanilla extract, and salt until the sugar is fully dissolved. Stir in the blended strawberries.
- Chill the Mixture: Cover the bowl and refrigerate the mixture for at least 2 hours, or until it is very cold.
- Prepare the Ice Cream Maker: Set up your Nostalgia ice cream maker according to the manufacturer’s instructions.
- Churn the Ice Cream: Pour the chilled ice cream mixture into the ice cream maker’s inner canister. Churn the ice cream for about 20-30 minutes, or until it reaches a soft-serve consistency.
- Freeze: Transfer the ice cream to an airtight container and freeze for at least 2 hours, or until it reaches your desired firmness.
- Serve: Enjoy your delightful, homemade strawberry ice cream!
Unique Nostalgia Ice Cream Maker Recipes
If you’re looking to add a twist to your ice cream flavors, try these unique Nostalgia ice cream maker recipes. They offer a fun and exciting way to enjoy homemade ice cream.
Peach Cobbler Ice Cream
| Ingredients | Quantity |
|---|---|
| Fresh peaches, peeled and diced | 2 cups (340g) |
| Brown sugar | 1/2 cup (100g) |
| Heavy cream | 2 cups (473 ml) |
| Whole milk | 1 cup (237 ml) |
| Vanilla extract | 1 tsp |
| Cinnamon | 1/2 tsp |
| Salt | 1/4 tsp |
| Ice | As needed |
| Rock salt | As needed |
Instructions:
- Prepare the Peaches: In a saucepan, combine the diced peaches and brown sugar. Cook over medium heat until the peaches are soft and the mixture is syrupy. Let it cool.
- Combine Ingredients: In a large bowl, whisk together the heavy cream, whole milk, vanilla extract, cinnamon, and salt until well combined. Stir in the cooled peach mixture.
- Chill the Mixture: Cover the bowl and refrigerate the mixture for at least 2 hours, or until it is very cold.
- Prepare the Ice Cream Maker: Set up your Nostalgia ice cream maker according to the manufacturer’s instructions.
- Churn the Ice Cream: Pour the chilled ice cream mixture into the ice cream maker’s inner canister. Churn the ice cream for about 20-30 minutes, or until it reaches a soft-serve consistency.
- Freeze: Transfer the ice cream to an airtight container and freeze for at least 2 hours, or until it reaches your desired firmness.
- Serve: Enjoy your unique, homemade peach cobbler ice cream!
Mint Chocolate Chip Ice Cream
| Ingredients | Quantity |
|---|---|
| Heavy cream | 2 cups (473 ml) |
| Whole milk | 1 cup (237 ml) |
| Granulated sugar | 3/4 cup (150g) |
| Peppermint extract | 1 tsp |
| Green food coloring (optional) | A few drops |
| Mini chocolate chips | 1/2 cup (85g) |
| Ice | As needed |
| Rock salt | As needed |
Instructions:
- Combine Ingredients: In a large bowl, whisk together the heavy cream, whole milk, granulated sugar, peppermint extract, and a few drops of green food coloring (if using) until the sugar is fully dissolved.
- Chill the Mixture: Cover the bowl and refrigerate the mixture for at least 2 hours, or until it is very cold.
- Prepare the Ice Cream Maker: Set up your Nostalgia ice cream maker according to the manufacturer’s instructions.
- Churn the Ice Cream: Pour the chilled ice cream mixture into the ice cream maker’s inner canister. Churn the ice cream for about 20-30 minutes, or until it reaches a soft-serve consistency.
- Add Chocolate Chips: Stir in the mini chocolate chips during the last few minutes of churning to ensure even distribution.
- Freeze: Transfer the ice cream to an airtight container and freeze for at least 2 hours, or until it reaches your desired firmness.
- Serve: Enjoy your refreshing, homemade mint chocolate chip ice cream!
Coffee Ice Cream
| Ingredients | Quantity |
|---|---|
| Heavy cream | 2 cups (473 ml) |
| Whole milk | 1 cup (237 ml) |
| Granulated sugar | 3/4 cup (150g) |
| Strong brewed coffee, cooled | 1/2 cup (118 ml) |
| Vanilla extract | 1 tsp |
| Ice | As needed |
| Rock salt | As needed |
Instructions:
- Combine Ingredients: In a large bowl, whisk together the heavy cream, whole milk, granulated sugar, cooled brewed coffee, and vanilla extract until the sugar is fully dissolved.
- Chill the Mixture: Cover the bowl and refrigerate the mixture for at least 2 hours, or until it is very cold.
- Prepare the Ice Cream Maker: Set up your Nostalgia ice cream maker according to the manufacturer’s instructions.
- Churn the Ice Cream: Pour the chilled ice cream mixture into the ice cream maker’s inner canister. Churn the ice cream for about 20-30 minutes, or until it reaches a soft-serve consistency.
- Freeze: Transfer the ice cream to an airtight container and freeze for at least 2 hours, or until it reaches your desired firmness.
- Serve: Enjoy your rich, homemade coffee ice cream!
Tips for Making the Perfect Ice Cream with a Nostalgia Ice Cream Maker
Creating the perfect ice cream with a Nostalgia ice cream maker involves more than just following a recipe. Here are some essential tips to help you achieve the best results every time:
Chilling the Ingredients
- Cold Ingredients: Ensure all your ingredients are very cold before starting. This helps the ice cream mixture freeze more quickly and evenly.
- Pre-Chill the Bowl: If your ice cream maker has a removable bowl, pre-chill it in the freezer for at least 24 hours before use. This ensures the bowl is cold enough to freeze the ice cream mixture efficiently.
Using the Right Amount of Salt and Ice
- Layer Properly: Alternate layers of ice and rock salt around the ice cream maker’s canister. Start with a layer of ice, followed by a layer of rock salt, and repeat until the canister is surrounded.
- Salt-to-Ice Ratio: Use a ratio of about 1 part rock salt to 6-8 parts ice. This ensures the ice cream freezes evenly without becoming too salty.
Churning for the Perfect Texture
- Consistent Churning: Churn the ice cream continuously until it reaches a soft-serve consistency. This ensures a smooth and creamy texture.
- Avoid Over-Churning: Be careful not to over-churn the ice cream, as this can incorporate too much air and result in a crumbly texture.
Storing Your Ice Cream
- Airtight Container: Store your homemade ice cream in an airtight container to prevent freezer burn and maintain freshness.
- Freeze Quickly: Transfer the ice cream to the freezer as soon as it reaches the desired consistency to prevent melting and refreezing, which can affect the texture.
Variations of Nostalgia Ice Cream Maker Recipes
One of the best things about making ice cream at home is the ability to customize your flavors. Here are some variations to try with your Nostalgia ice cream maker:
Adding Fruits for a Tropical Twist
- Mango: Blend ripe mango flesh and mix it into your ice cream base for a sweet and tropical flavor.
- Pineapple: Add finely chopped fresh pineapple to your ice cream mixture for a refreshing, tangy note.
- Coconut: Incorporate coconut milk and shredded coconut for a creamy, tropical ice cream.
Incorporating Nuts and Seeds
- Almonds: Add chopped almonds to your ice cream mixture for a crunchy, nutty flavor.
- Pecans: Mix in chopped pecans for a rich, buttery note that pairs well with vanilla or chocolate ice cream.
- Chia Seeds: Incorporate chia seeds for added texture and nutritional benefits.
Experimenting with Spices
- Cinnamon: Add a pinch of cinnamon to your ice cream mixture for a warm, aromatic flavor.
- Nutmeg: Sprinkle in some nutmeg for a subtle, sweet spice that complements creamy ice cream.
- Cardamom: Incorporate cardamom for an exotic, floral note that pairs well with vanilla or coffee ice cream.
Frequently Asked Questions (FAQs)
How Long Does Homemade Ice Cream Last?
Homemade ice cream can last for up to one week in the freezer when stored in an airtight container. However, it is best enjoyed within the first few days for optimal freshness and texture.
Can I Use Non-Dairy Milk for Ice Cream?
Yes, you can use non-dairy milk to make ice cream. Almond milk, coconut milk, and oat milk are popular alternatives. Keep in mind that the texture and flavor may vary slightly compared to ice cream made with dairy milk.
What If My Ice Cream Is Too Hard?
If your ice cream turns out too hard, it may be due to over-freezing or not enough fat content in the recipe. Here are some tips to prevent this:
- Adjust Fat Content: Ensure your recipe includes enough heavy cream or other high-fat ingredients to maintain a creamy texture.
- Thaw Before Serving: Let the ice cream sit at room temperature for a few minutes before serving to soften it slightly.
- Add Alcohol: A small amount of alcohol, such as vodka or rum, can help prevent the ice cream from freezing too hard.
Can I Make Ice Cream Ahead of Time?
You can prepare the ice cream mixture ahead of time and store it in the refrigerator until ready to churn. However, it’s best to churn and freeze the ice cream just before serving to ensure the best texture and freshness.
How Do I Store Leftover Ice Cream?
Store leftover ice cream in an airtight container in the freezer. Ensure the container is sealed tightly to prevent freezer burn and maintain freshness. Consume the ice cream within one week for the best flavor and texture.
What Are Some Health Benefits of Homemade Ice Cream?
While ice cream is typically considered a treat, homemade ice cream can offer some health benefits:
- Calcium: Ice cream made with dairy milk provides calcium, which is essential for bone health.
- Vitamins and Minerals: Depending on the ingredients used, ice cream can contain various vitamins and minerals, such as vitamin A, vitamin D, and potassium.
- Protein: Ice cream made with milk and eggs provides protein, which is important for muscle repair and growth.
- Customizable: Making ice cream at home allows you to control the ingredients and adjust the recipe to suit your dietary needs and preferences.
By addressing these common questions, you’ll be well-equipped to handle any challenges that may arise during your ice cream making adventures.
Conclusion
Mastering Nostalgia ice cream maker recipes allows you to create delicious, homemade ice cream that brings back memories of simpler times. By understanding the essential ingredients, following step-by-step recipes, and applying helpful tips, you can create a variety of classic and unique ice cream flavors that will impress your friends and family.
Enjoy Your Nostalgic Ice Cream Creations!
Now that you have a comprehensive understanding of Nostalgia ice cream maker recipes, it’s time to get churning! Experiment with different flavors, share your creations with loved ones, and enjoy the fruits of your labor. Remember, practice makes perfect, so don’t be discouraged if your first attempt isn’t exactly as you envisioned. With each try, you’ll gain more experience and confidence in your ice cream making skills.
Happy churning, and enjoy your delicious, nostalgic ice cream creations!
For more ice cream recipes and tips, be sure to check out this helpful resource.